Keep your Google Calendar and Todoist completely in sync with this two-way integration.
Set up the integration
Warning
You can't set up the Google Calendar integration in Todoist for iOS and Todoist for Android. Log in at todoist.com in a web browser before setting up the integration.
- Click your avatar in the top-left.
- Select Settings.
- Click the Integrations tab.
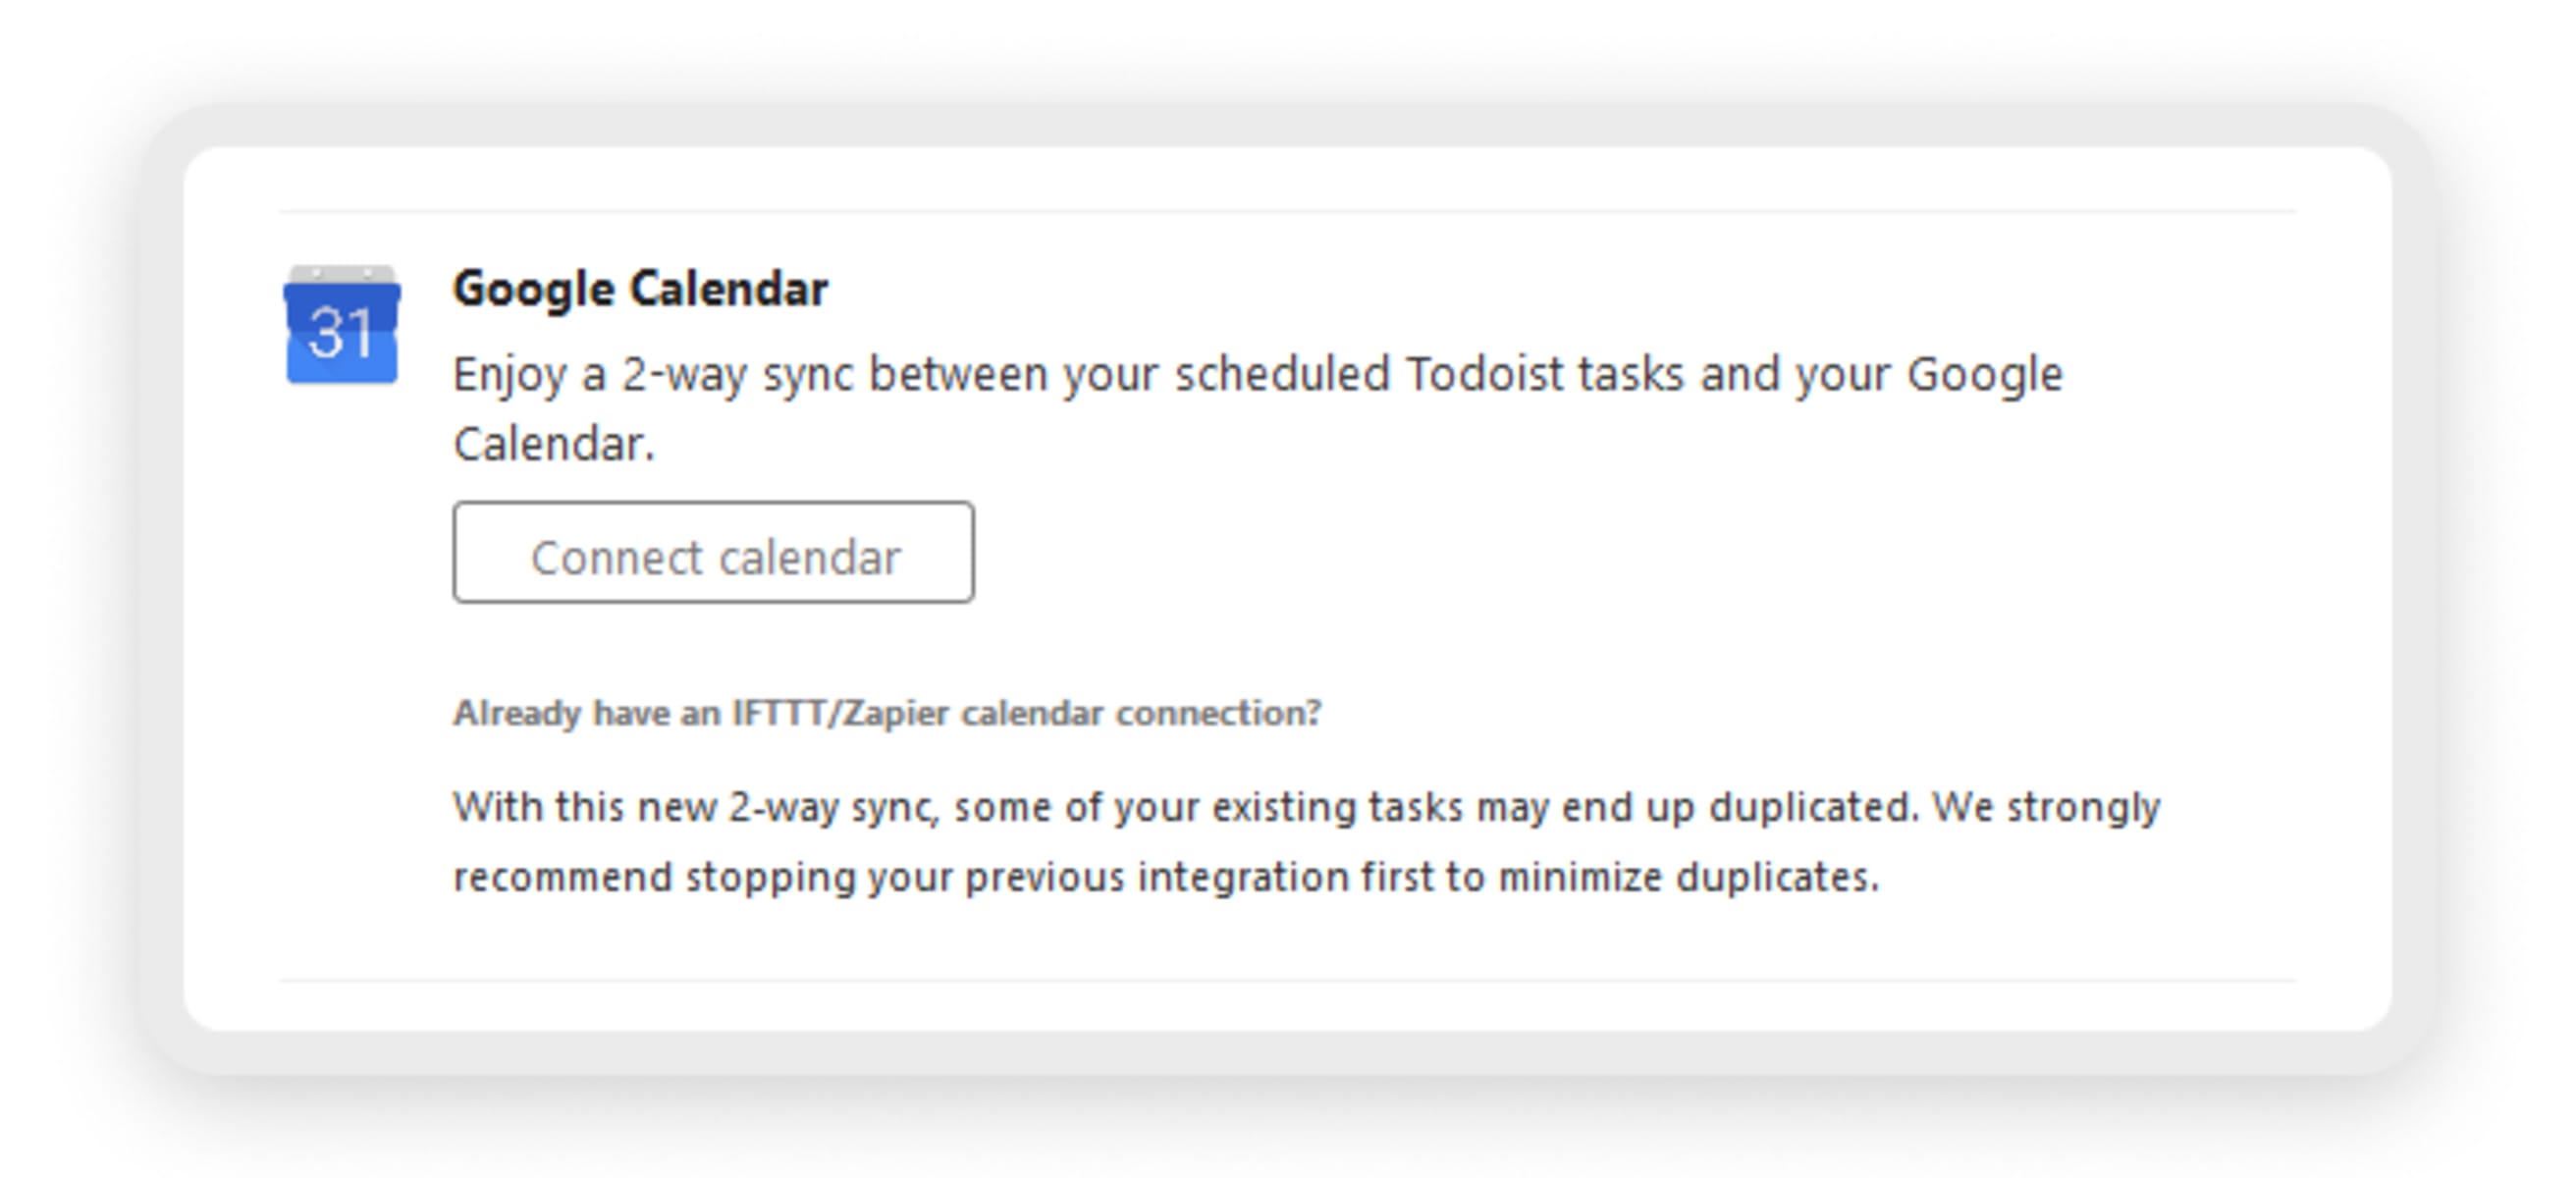
- In the Google Calendar section, click Connect calendar.
If you're using Todoist for macOS or for Windows, sign in to the Todoist web app to connect with Google Calendar.
- Log in with your Google account. If there are two or more Google accounts, choose the account to use with the integration.
- Click Allow to grant Todoist access to your Google Calendar.
- Click Agree to grant Google Calendar access to your data.
Then, set up the connection between your Todoist projects and a Google Calendar. Click Add calendar and set up the following:
- Google Calendar: create a new calendar to sync the project with. Events created in the selected calendar will only be added as Todoist tasks.
Warning
It's not possible to sync multiple Todoist projects with the same Google calendar.
- Sync: sync tasks from All projects or A specific project to the calendar. To sync multiple projects or calendars, set up additional connections later.
- Todoist project for new Google events: select which project you want new Google Calendar events to be synced to. (If you’re not sure which project to select, we recommend using your Todoist Inbox. You can always move the tasks to another project later.)
- Todoist label for new Google events: write the name of the label you want to add to tasks synced from the selected calendar.
If this label isn’t in your label list, it will automatically be created after setting up the integration.
- Google event duration for new Todoist tasks: select a default event duration for events synced from new Todoist tasks. New tasks with a due date and time will show up in Google Calendar with this duration. (You can always make changes to the event in Google Calendar once it’s created.)
- Todoist tasks without due time: select whether you want to sync tasks with a due date but no time. You can choose to sync these tasks as all-day events in Google Calendar, or you can opt to only sync tasks with a due date and due time.
- Completed Todoist tasks: select whether you want to leave an event on Google Calendar once the synced task is completed in Todoist.
Then, click Connect to finish the setup.
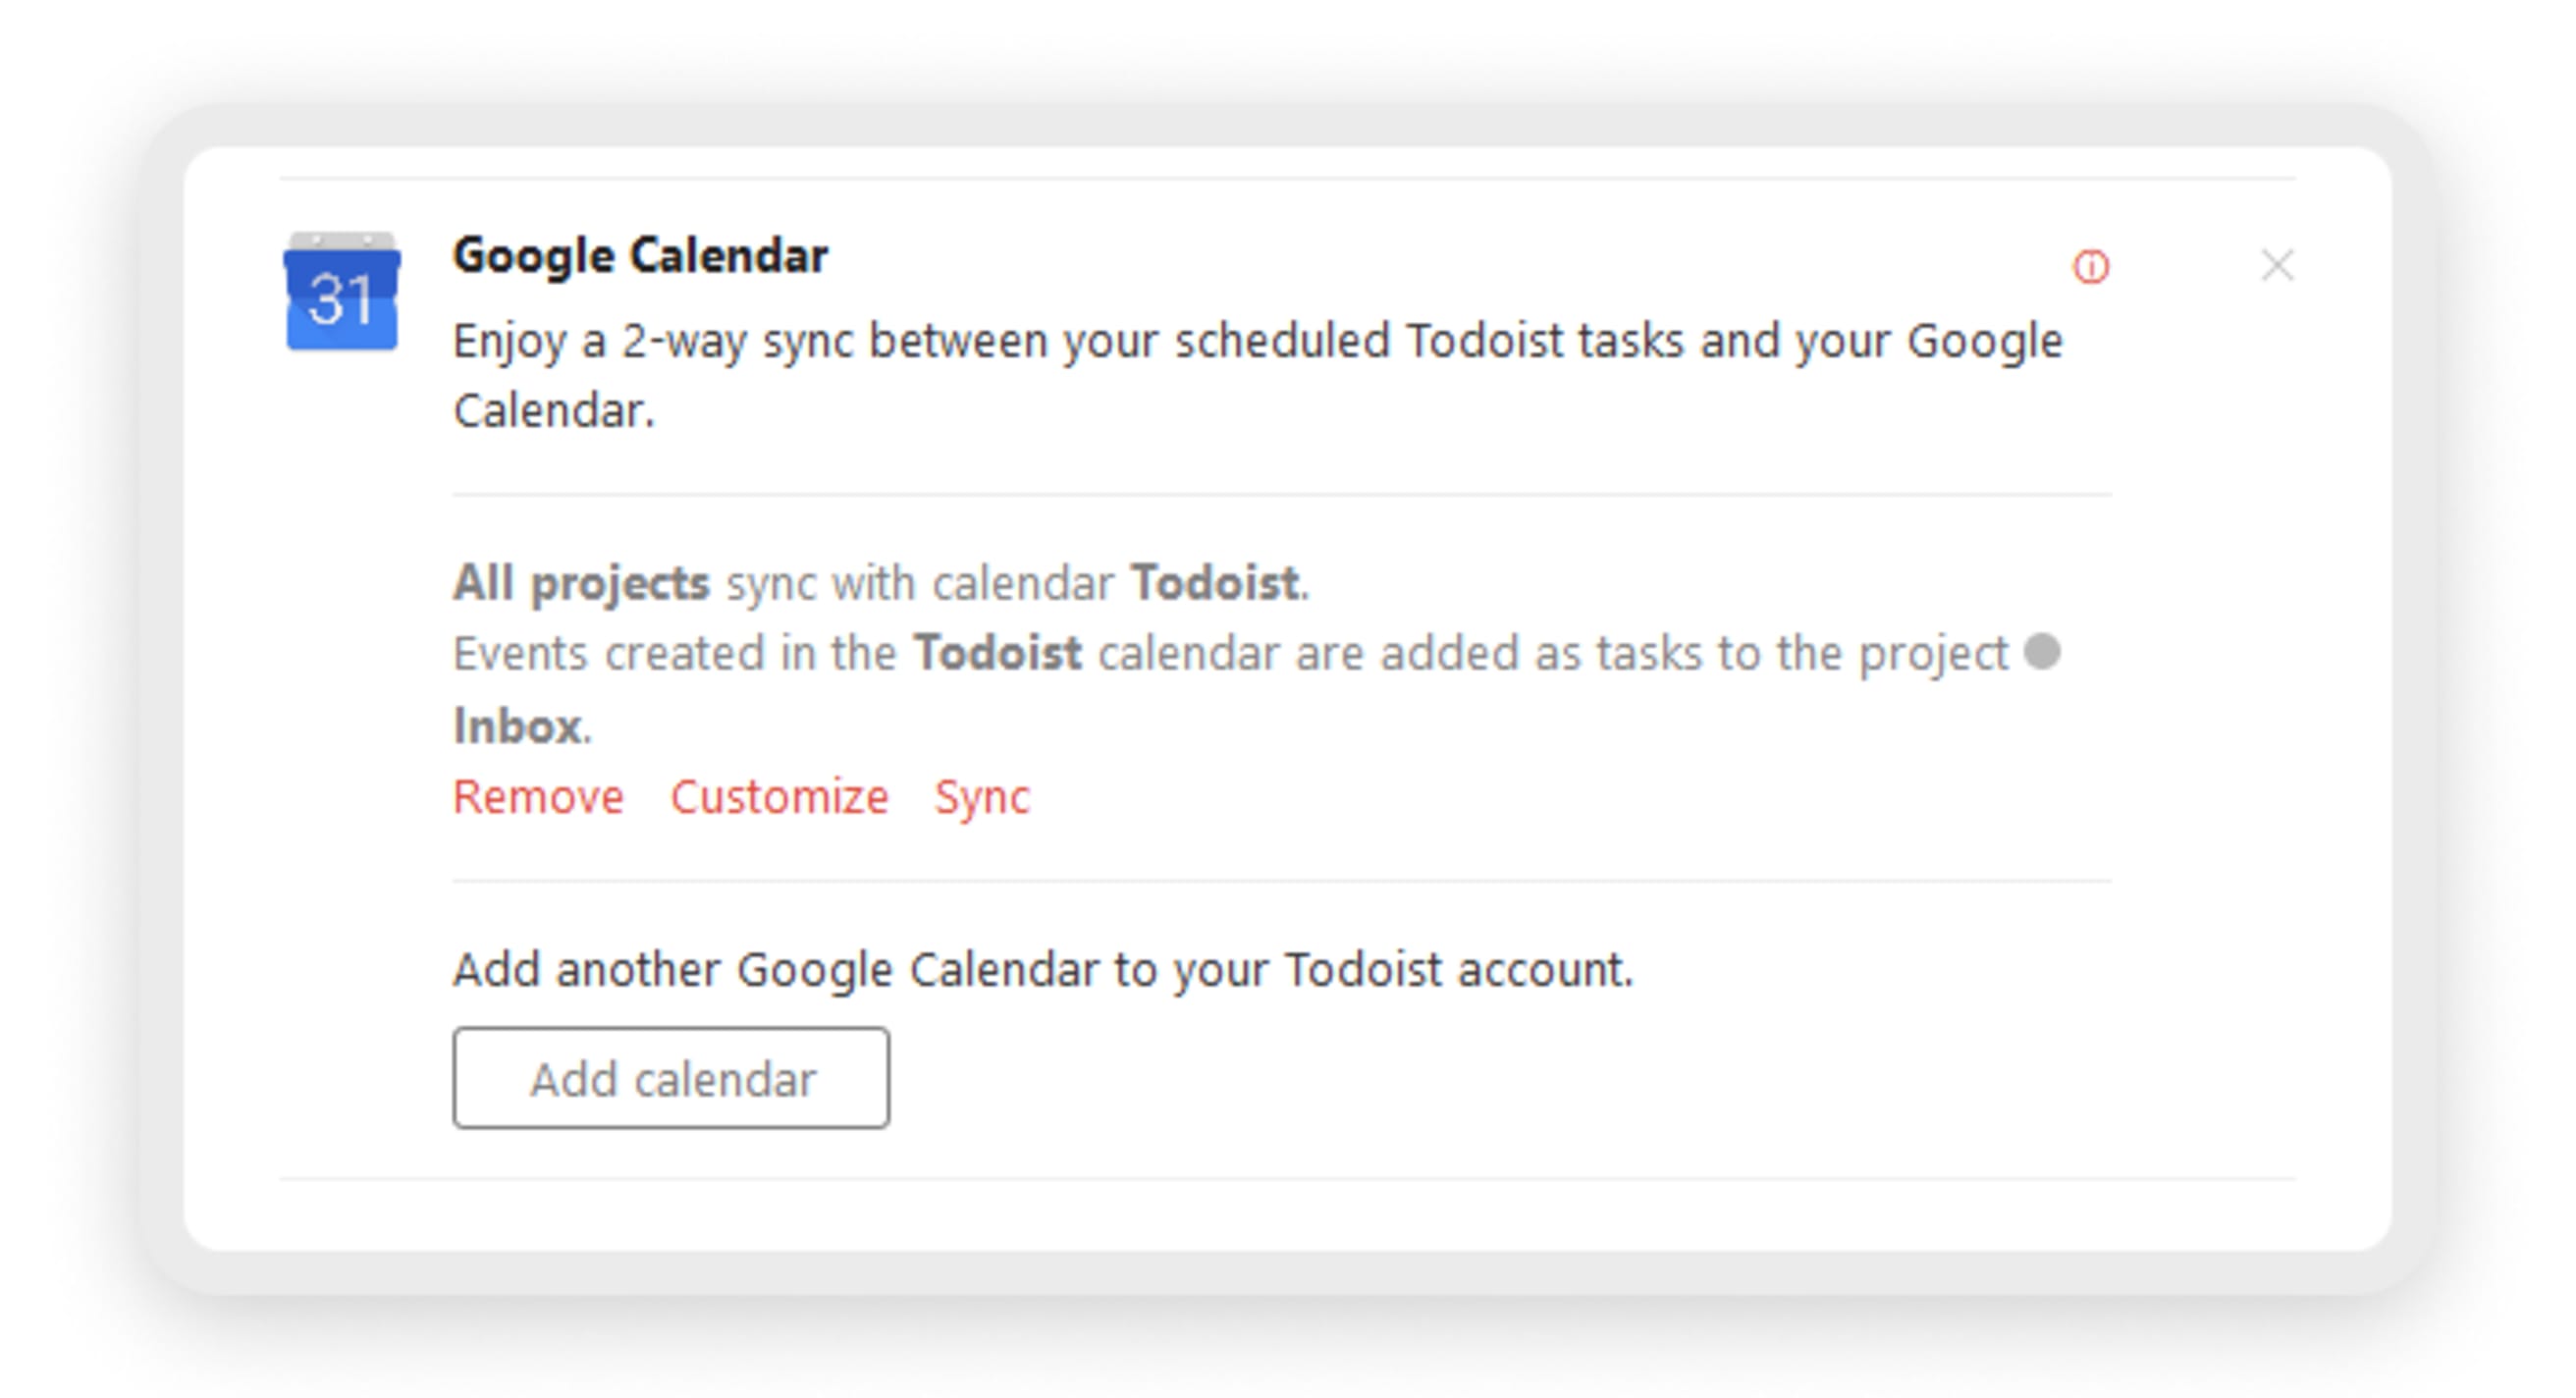
When you choose to link your primary Google calendar, all events will sync with Todoist as tasks.
If you remove these tasks, the corresponding calendar events will also be deleted.
If you opt to discontinue using the integration, you will need to manually delete the events generated by the integration.
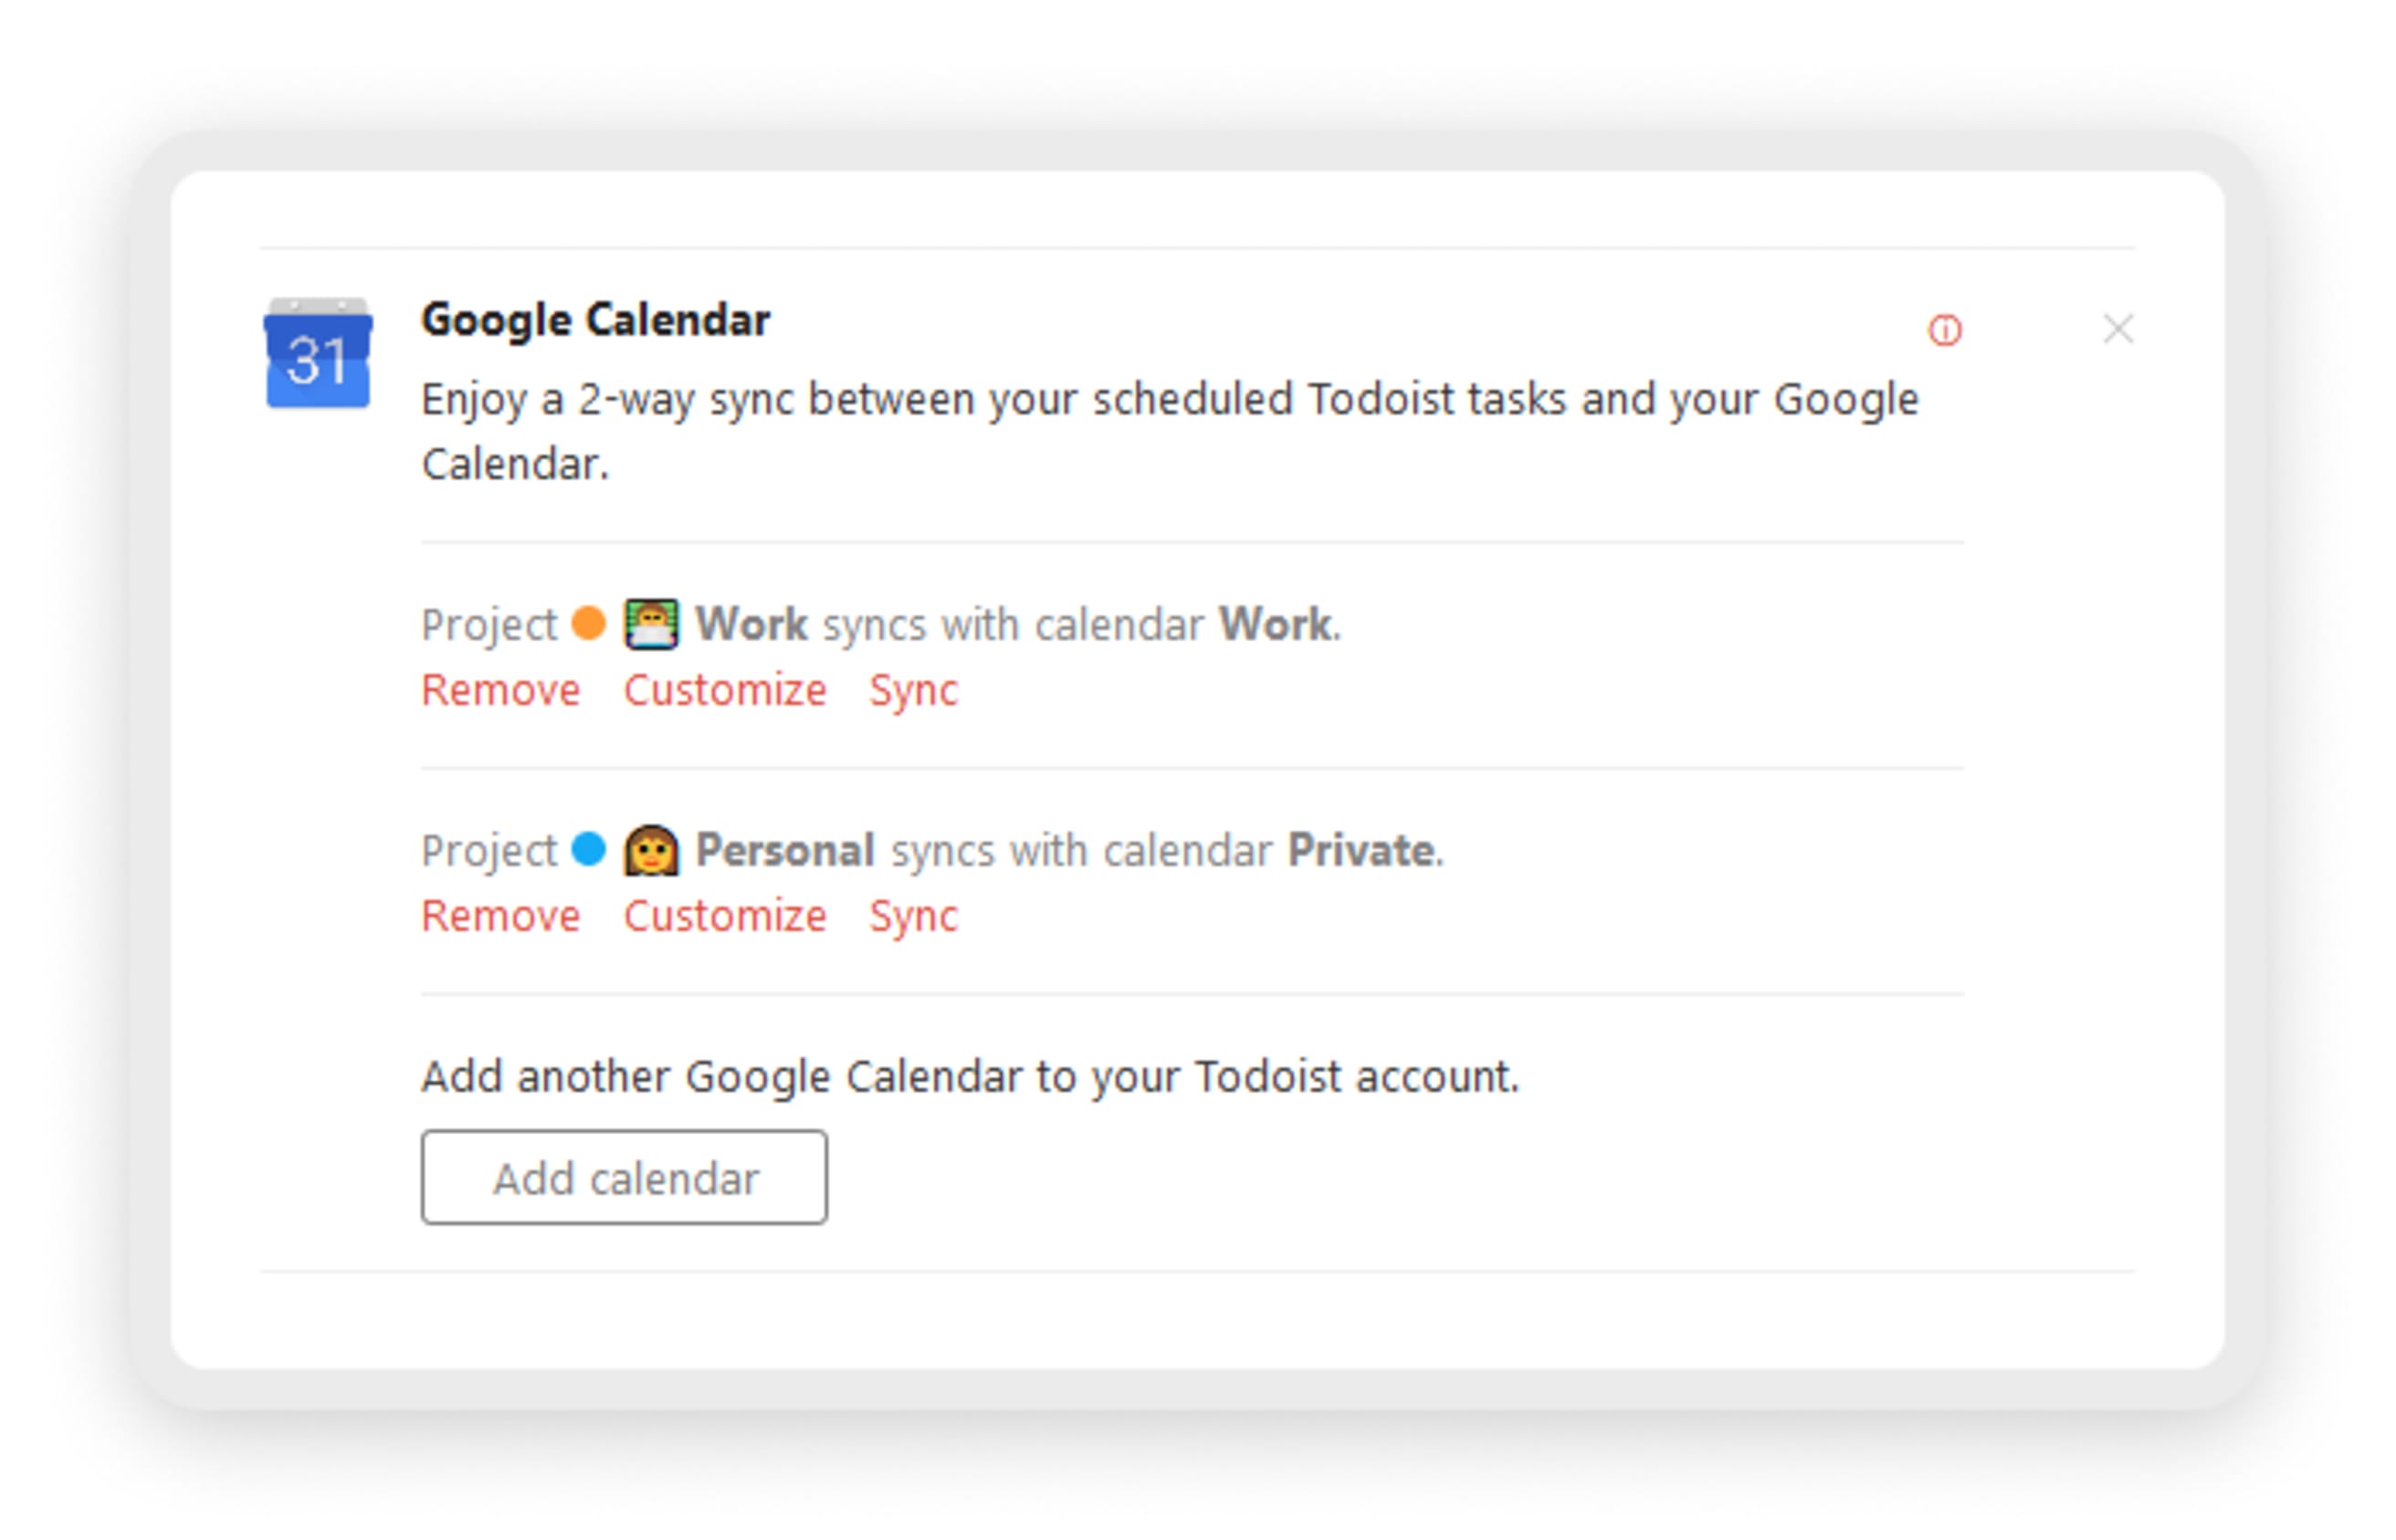
Connect multiple calendars and projects
Manage all your events and tasks by syncing additional Google Calendars with your Todoist projects.
If the All projects sync option is selected when initially setting up the integration, you won't be able to add connections with single projects.
- Click your avatar in the top-left.
- Select Settings.
- Click the Integrations tab.
- In the Google Calendar section, click Add Calendar.
Then, set up the connection between any Todoist project and Google Calendar:
- Google Calendar: create a new calendar to sync with the Todoist project. Events created in the selected calendar are added as Todoist tasks. Likewise, this makes it easy to display or hide Todoist-related events in Google Calendar.
Warning
It's not possible to sync multiple Todoist projects with the same Google calendar.
- Sync: choose to sync tasks from a specific project to the Google Calendar. Then, set up additional connections later to sync multiple projects.
- Todoist project for new Google events: select which project you want new Google Calendar events to be synced to. (If you’re not sure which project to select, we recommend using your Todoist Inbox. You can always move the tasks to another project later.)
- Todoist label for new Google events: write the name of the label you want to add to tasks synced from the selected calendar.
If this label isn’t in your label list, it will automatically be created after setting up the integration.
- Google event duration for new Todoist tasks: select a default event duration for events synced from new Todoist tasks. New tasks with a due date and time will show up in Google Calendar with this duration. (You can always make changes to the event in Google Calendar once it’s created.)
- Todoist tasks without due time: select whether you want to sync tasks with a due date but no time. You can choose to sync these tasks as all-day events in Google Calendar, or you can opt to only sync tasks with a due date and time.
- Completed Todoist tasks: select whether you want to leave an event on Google Calendar once the synced task is completed in Todoist.
Then, click Connect to finish the setup.
Use the integration
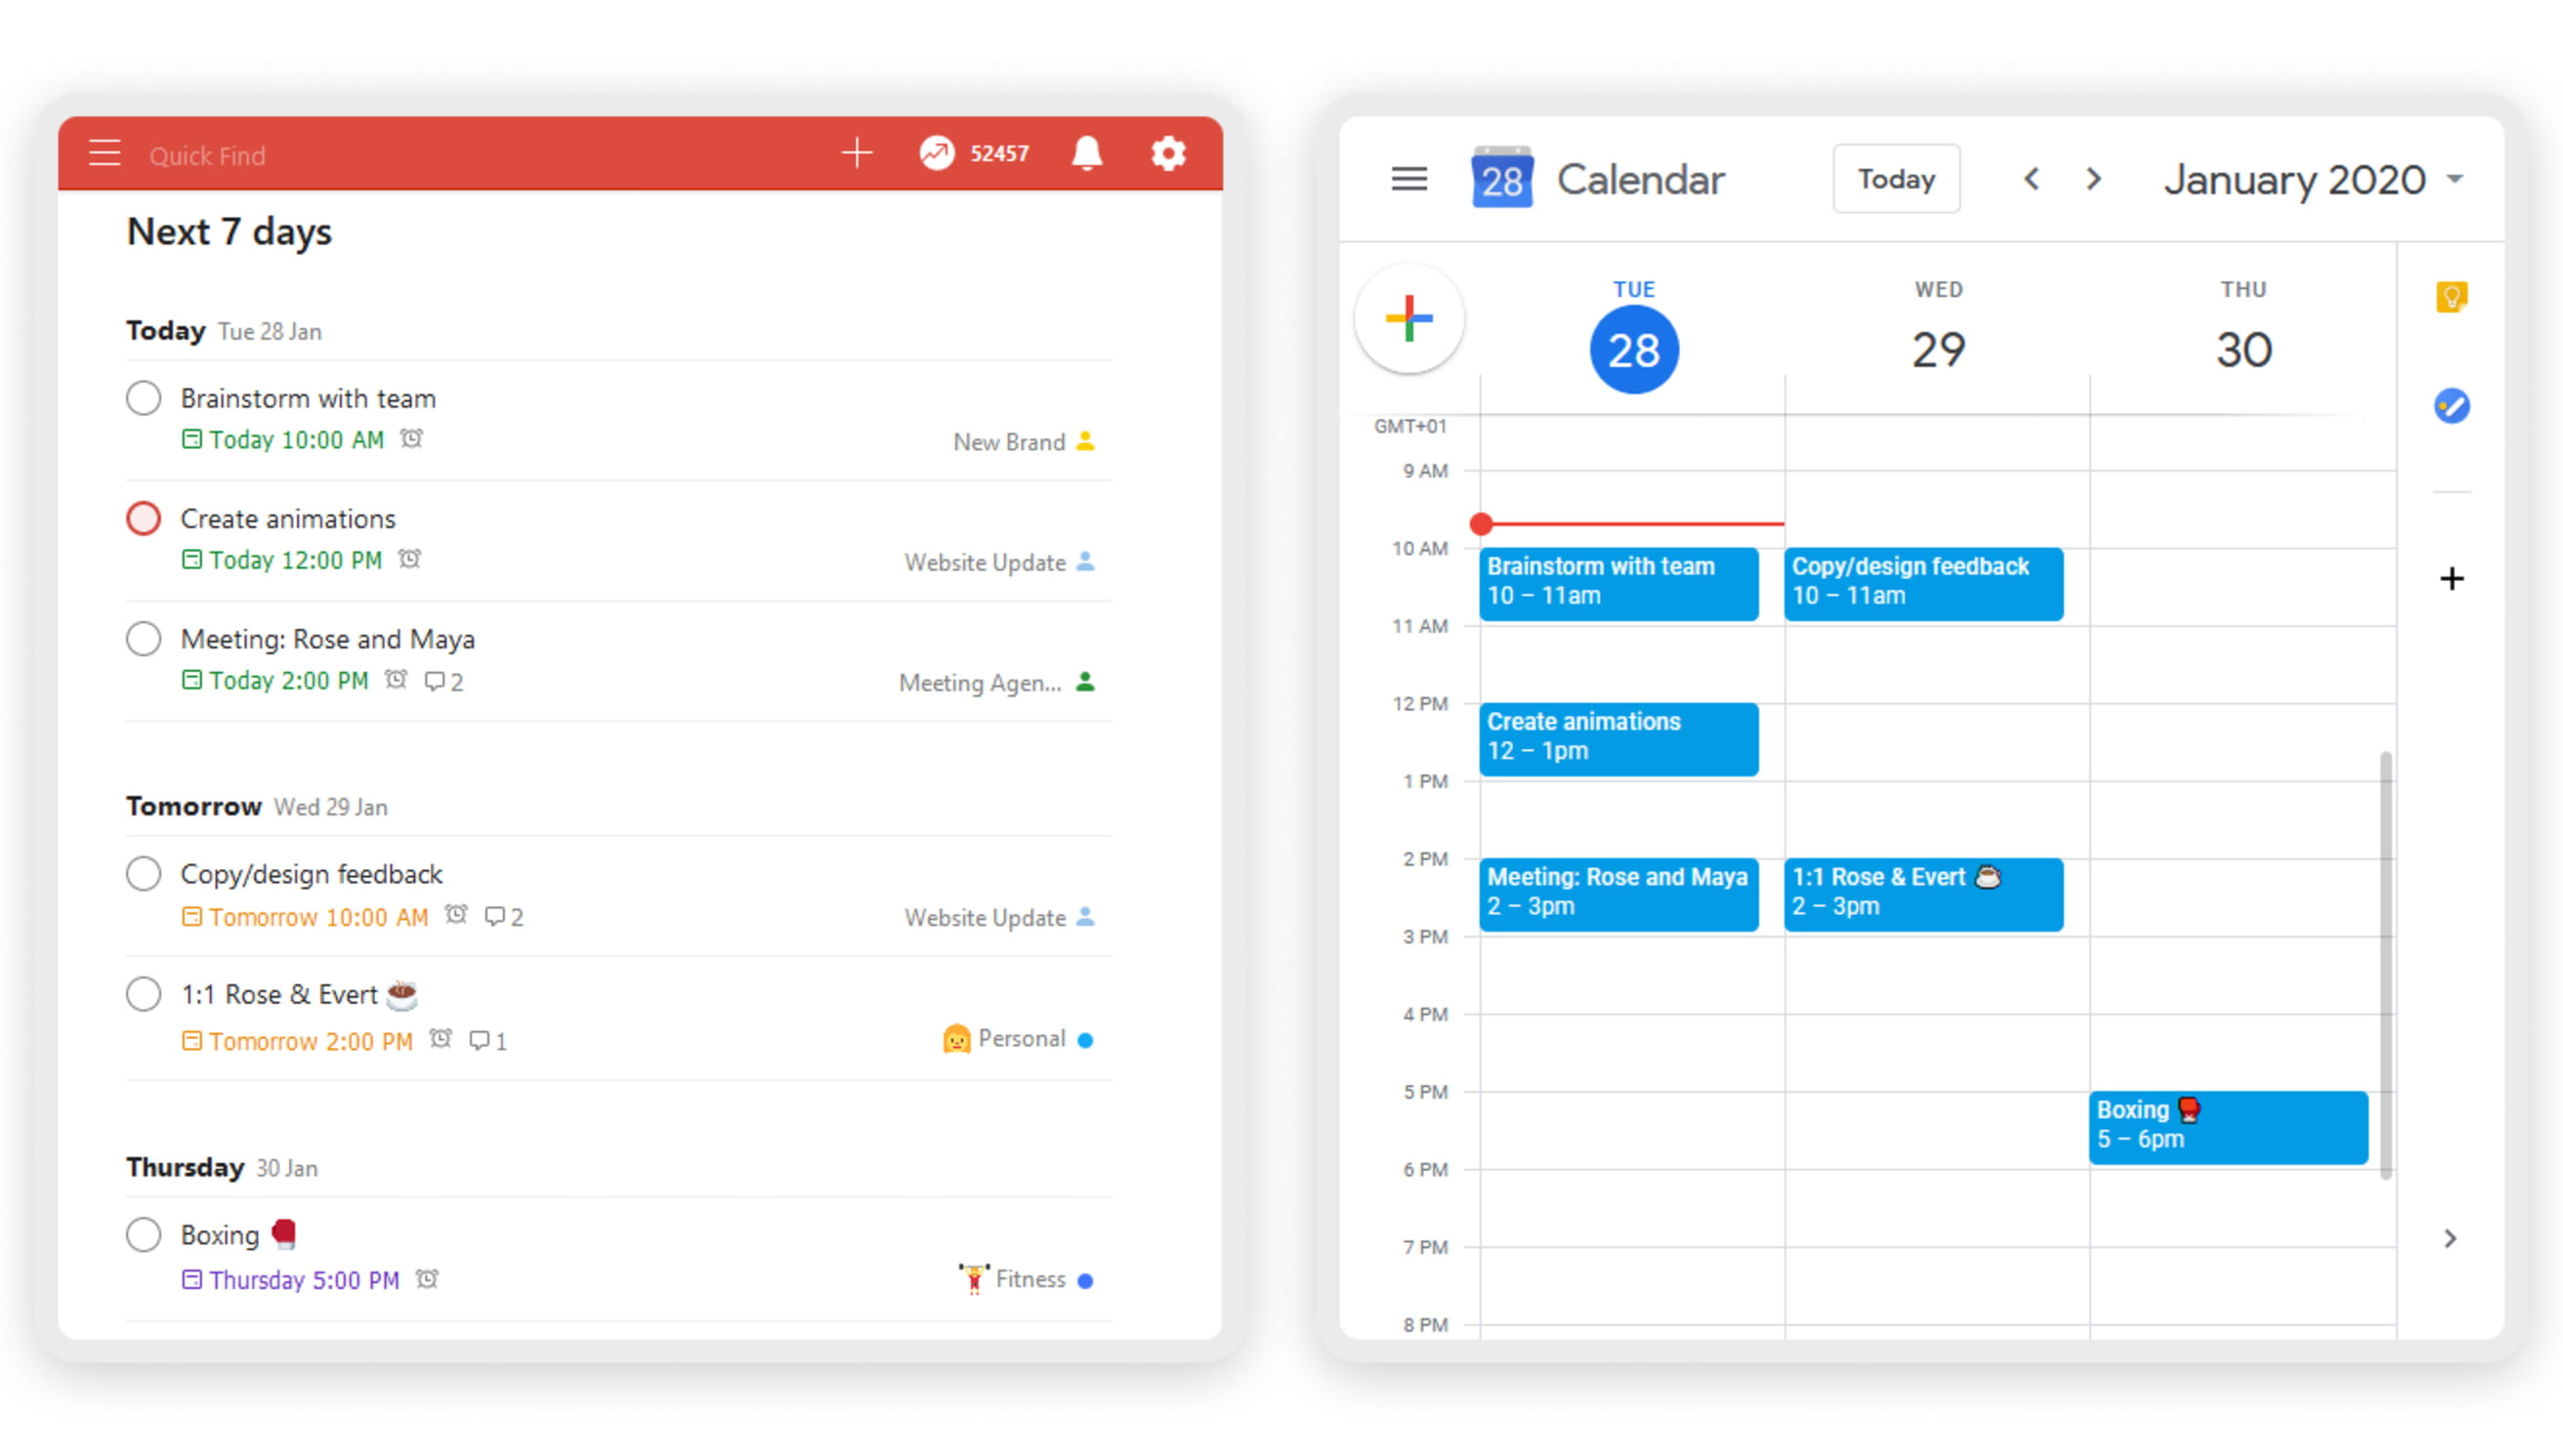
After setting up the integration, tasks with a due date and due time from the selected Todoist project(s) will be automatically added to the Google Calendar you’ve chosen.
Likewise, any regular events created in that calendar will be automatically added to the Todoist project you’ve chosen.
Any changes you make in Google Calendar – like editing an event name or changing the date – will be reflected back in Todoist, and vice versa.
If you use the [Xm] duration format, and you save changes to your task, [80m] will be removed from the task name.
With either of the two formats, the Due date section in the task view will display the task duration (for example: 16:00-17:20).
To add a label to your Todoist task, write "@LabelName" in the Google event's title. It'll be parsed as an existing label in Todoist.
To have your event saved in a different project in Todoist, write #ProjectName in the event's title in your synced Google Calendar. The synced task will automatically move to that project.
You can add or change a priority level by simply typing !!1, !!2 or !!3 in the Google event's title. The changes will instantly be reflected in Todoist.
Remove the integration
- Select Settings.
- Click the Integrations tab.
- Click the dismiss icon beside Google Calendar.
- Click OK to confirm.
- Select Settings.
- Click the Integrations tab.
- In the Google Calendar section, find the connection to remove.
- Select Remove.
Remove Todoist tasks and Google Calendar events created with this integration
When you remove the integration between your Todoist and Google Calendar, the tasks and events that were created in your Google Calendar and Todoist account will still appear. Here’s how to remove them:
- Open the Todoist web app.
- Go to the project that your Google Calendar events have been synced to.
- If you’re unsure which project was synced, find a synced Todoist task on your Google Calendar and search for that task in Todoist.
- Bulk select and delete all tasks that synced from Google Calendar.
- Open Google Calendar.
- In the left panel, under My calendars, click on the X to the right of the calendar that was created during the setup of the integration, called Todoist by default.
- Confirm you want to delete the calendar by selecting Remove Calendar.
- Log in to Todoist at https://todoist.com.
- Go to the project that your Google Calendar events have been synced to.
- If you’re unsure which project was synced, find a synced Todoist task on your Google Calendar and search for that task in Todoist.
- Bulk select and delete all tasks that have been synced from Google Calendar.
- Open Google Calendar.
- In the left panel, under My calendars, deselect all calendars except for the one that was synced to your Todoist account, so you don’t accidentally remove tasks from other calendars.
- Right-click each event that’s synced from Todoist and select Delete. Repeat this step for all events that have been synced from your Todoist project(s).
Noteworthy
- The Google Calendar integration only syncs regular events with Todoist. Focus time, Out of office, and Working location events are excluded.
- To move a task to a different project while it's synced to your Google calendar, set up the integration to sync all Todoist projects to the Google calendar. If only a single Todoist project is synced, the task can't be moved to a different project.
- Tasks in a synced project will always appear in the Google calendar. Choose to sync specific projects, instead of syncing all projects, to prevent displaying all your tasks in your calendar.
Get help
If you have a question or experienced an issue with the integration, learn how to resolve them with our troubleshooting guide.