When using Gmail, easily turn an email into a new Todoist task with one of our integrations. You’ve got two options:
- The “Todoist for Gmail” Chrome extension can be used to add emails as tasks from Google Chrome.
- The “Todoist for Gmail” Google Workspace add-on can be used to add tasks from Gmail for web, iOS, and Android.
Here's how to set up and use both integrations:
Todoist for Gmail Chrome Extension
Set up the extension
- Go to the Chrome Web Store.
- Search for Todoist for Gmail and select it.
- At the top right, click on Add to Chrome.
- In the pop-up window, select Add extension.
Use the extension
- Open the email you want to turn into a task.
- In the icons bar directly above the email, click on the Todoist icon.
- At the bottom right, a new task will be loaded into Todoist. The task will have the email title as its name, and it will link to the email.
- (Optional) Add any additional details about the task such as labels, a priority, a date or an assignee by using the quick add options.
- Click Add task.
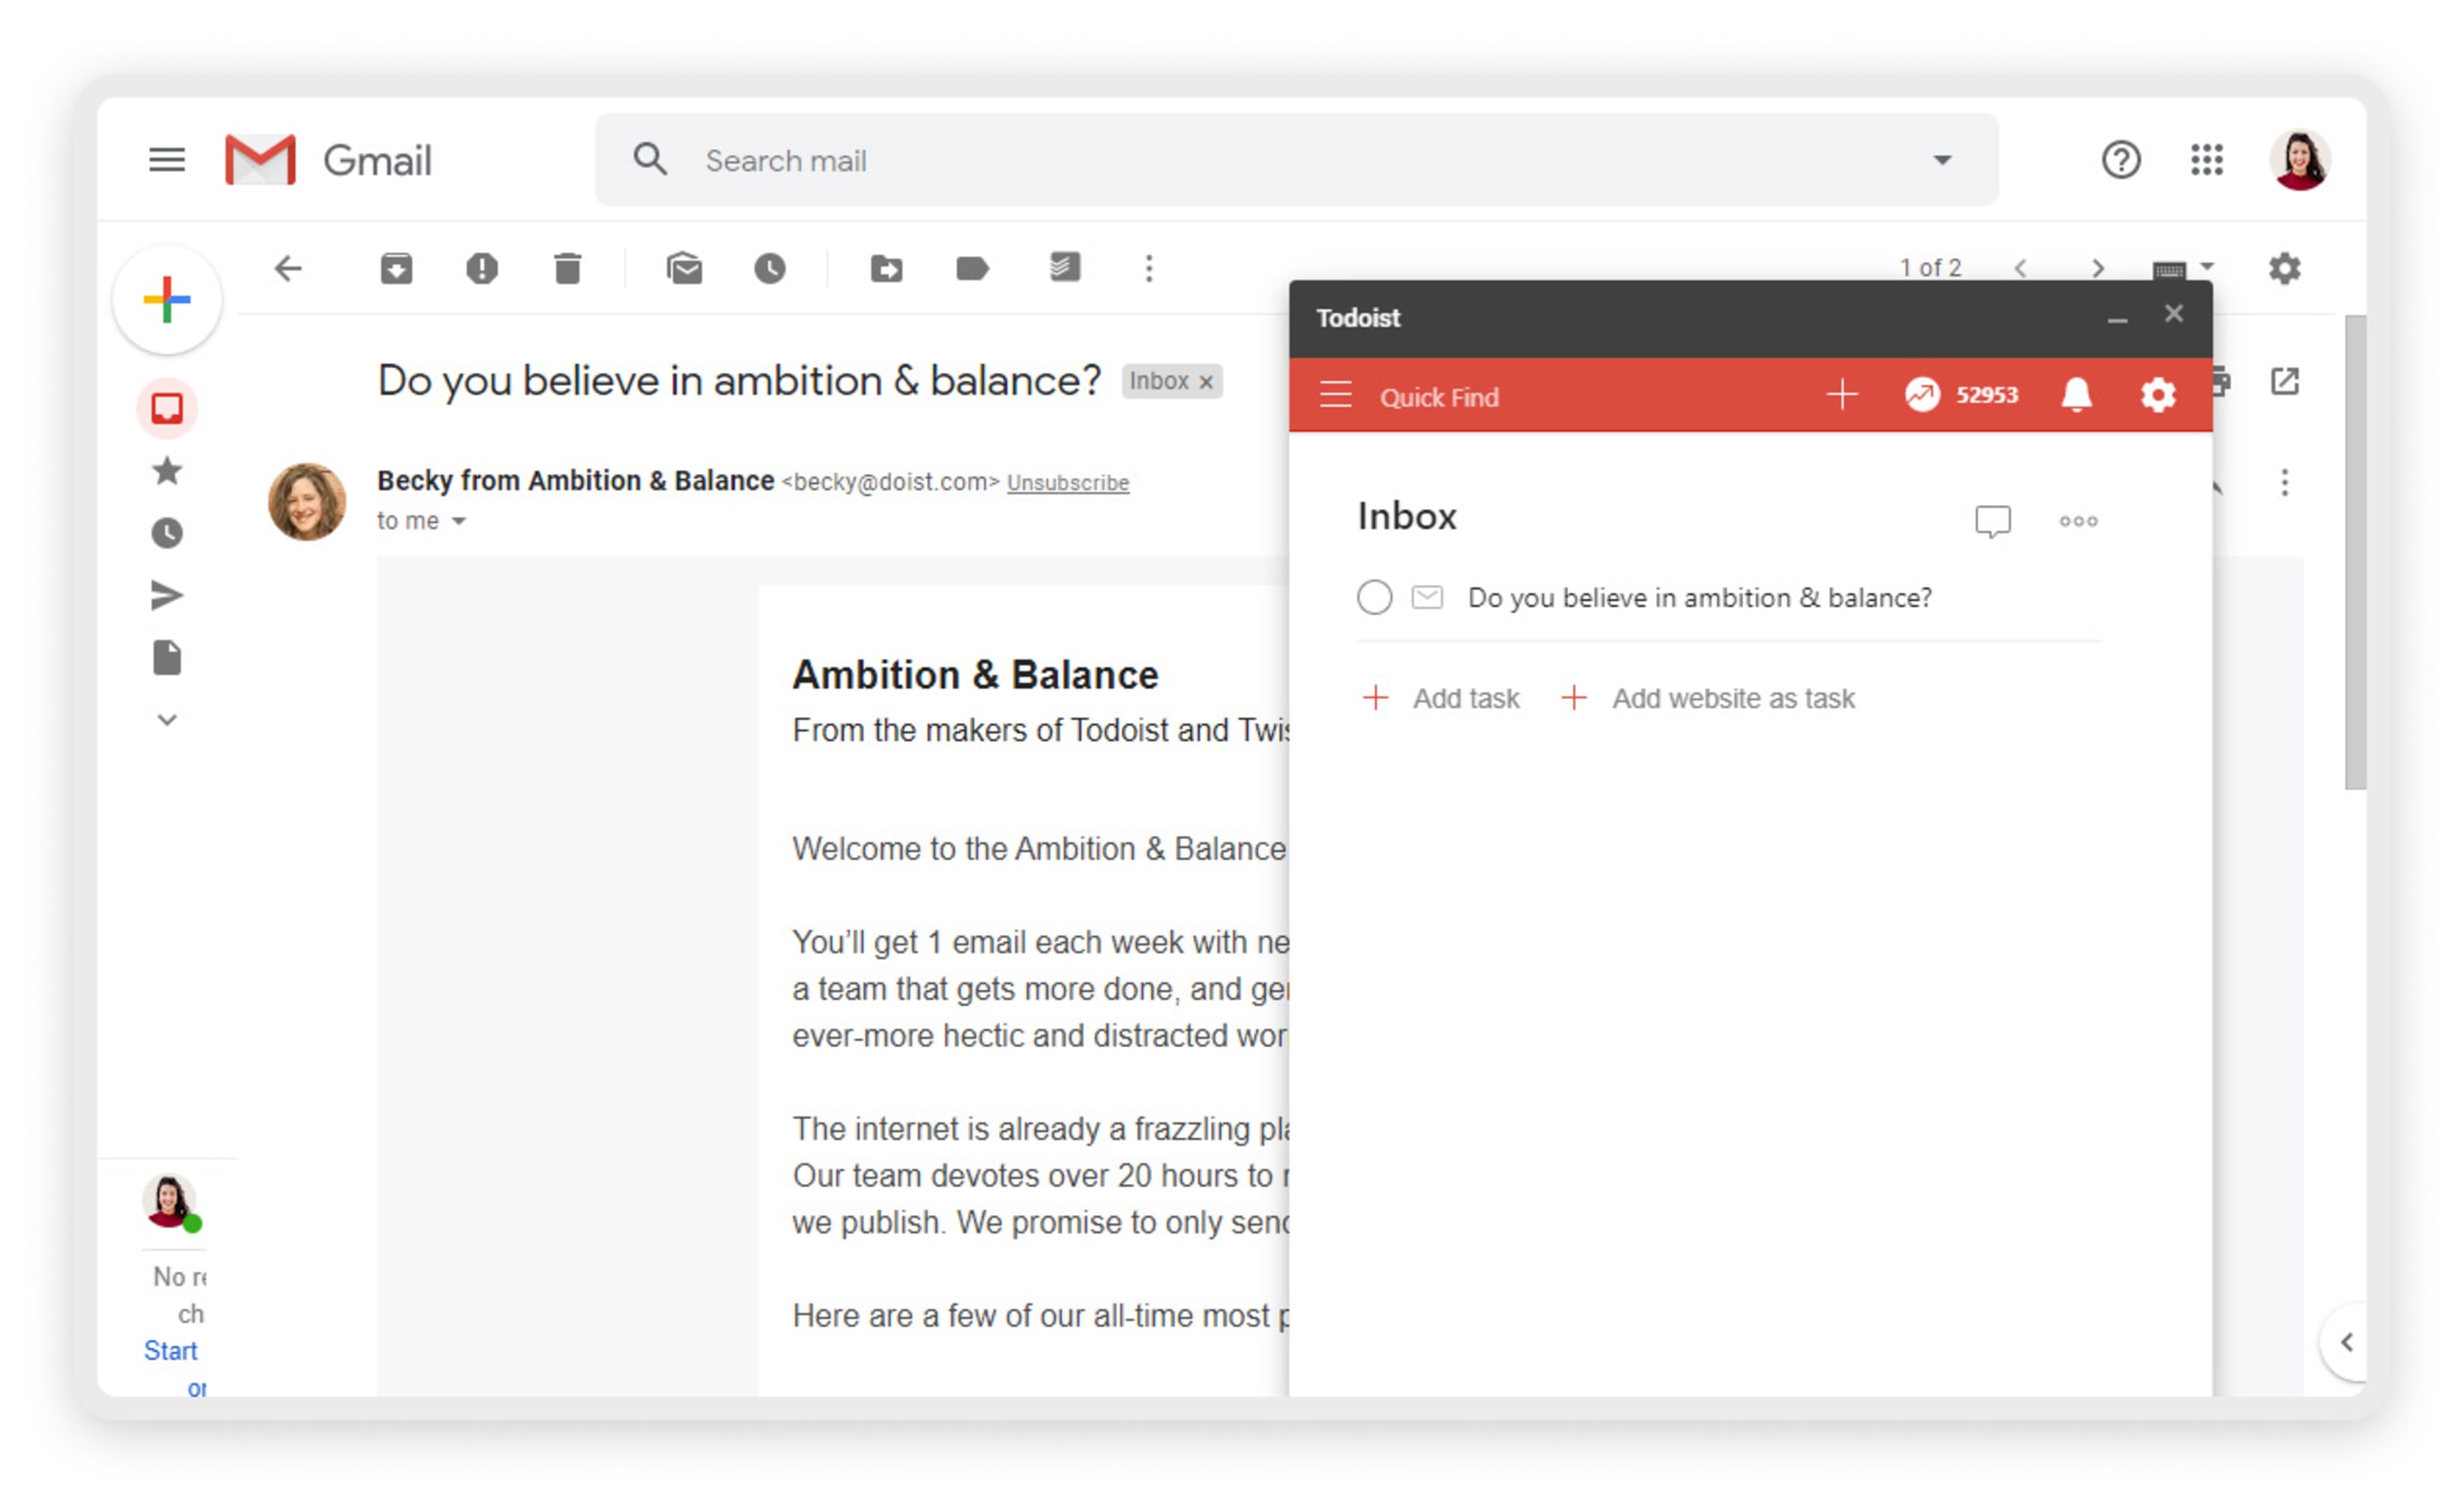
Simply click on any task created via the extension to view the email in a browser window.
Note
After you install the extension, you can also use Todoist from directly within Gmail by clicking the Todoist bar in the bottom right of Gmail. You'll have full access to Todoist so you can add, complete, view your tasks and more, all without having to open a new window.
Warning
Remove the extension
If you no longer want to use the Chrome extension, follow Google's instructions to remove it.
Todoist for Gmail Google Workspace add-on
Set up the add-on
- Go to mail.google.com.
- In the panel to the right, click on the + symbol to open the Google Workspace Marketplace. (If the side panel is not visible, you can toggle it on by clicking the <button at the bottom right.)
- Search for Todoist for Gmail and select it.
- Click Install.
- Authorize the integration.
- Click Allow.
Use the add-on
Add tasks through Gmail
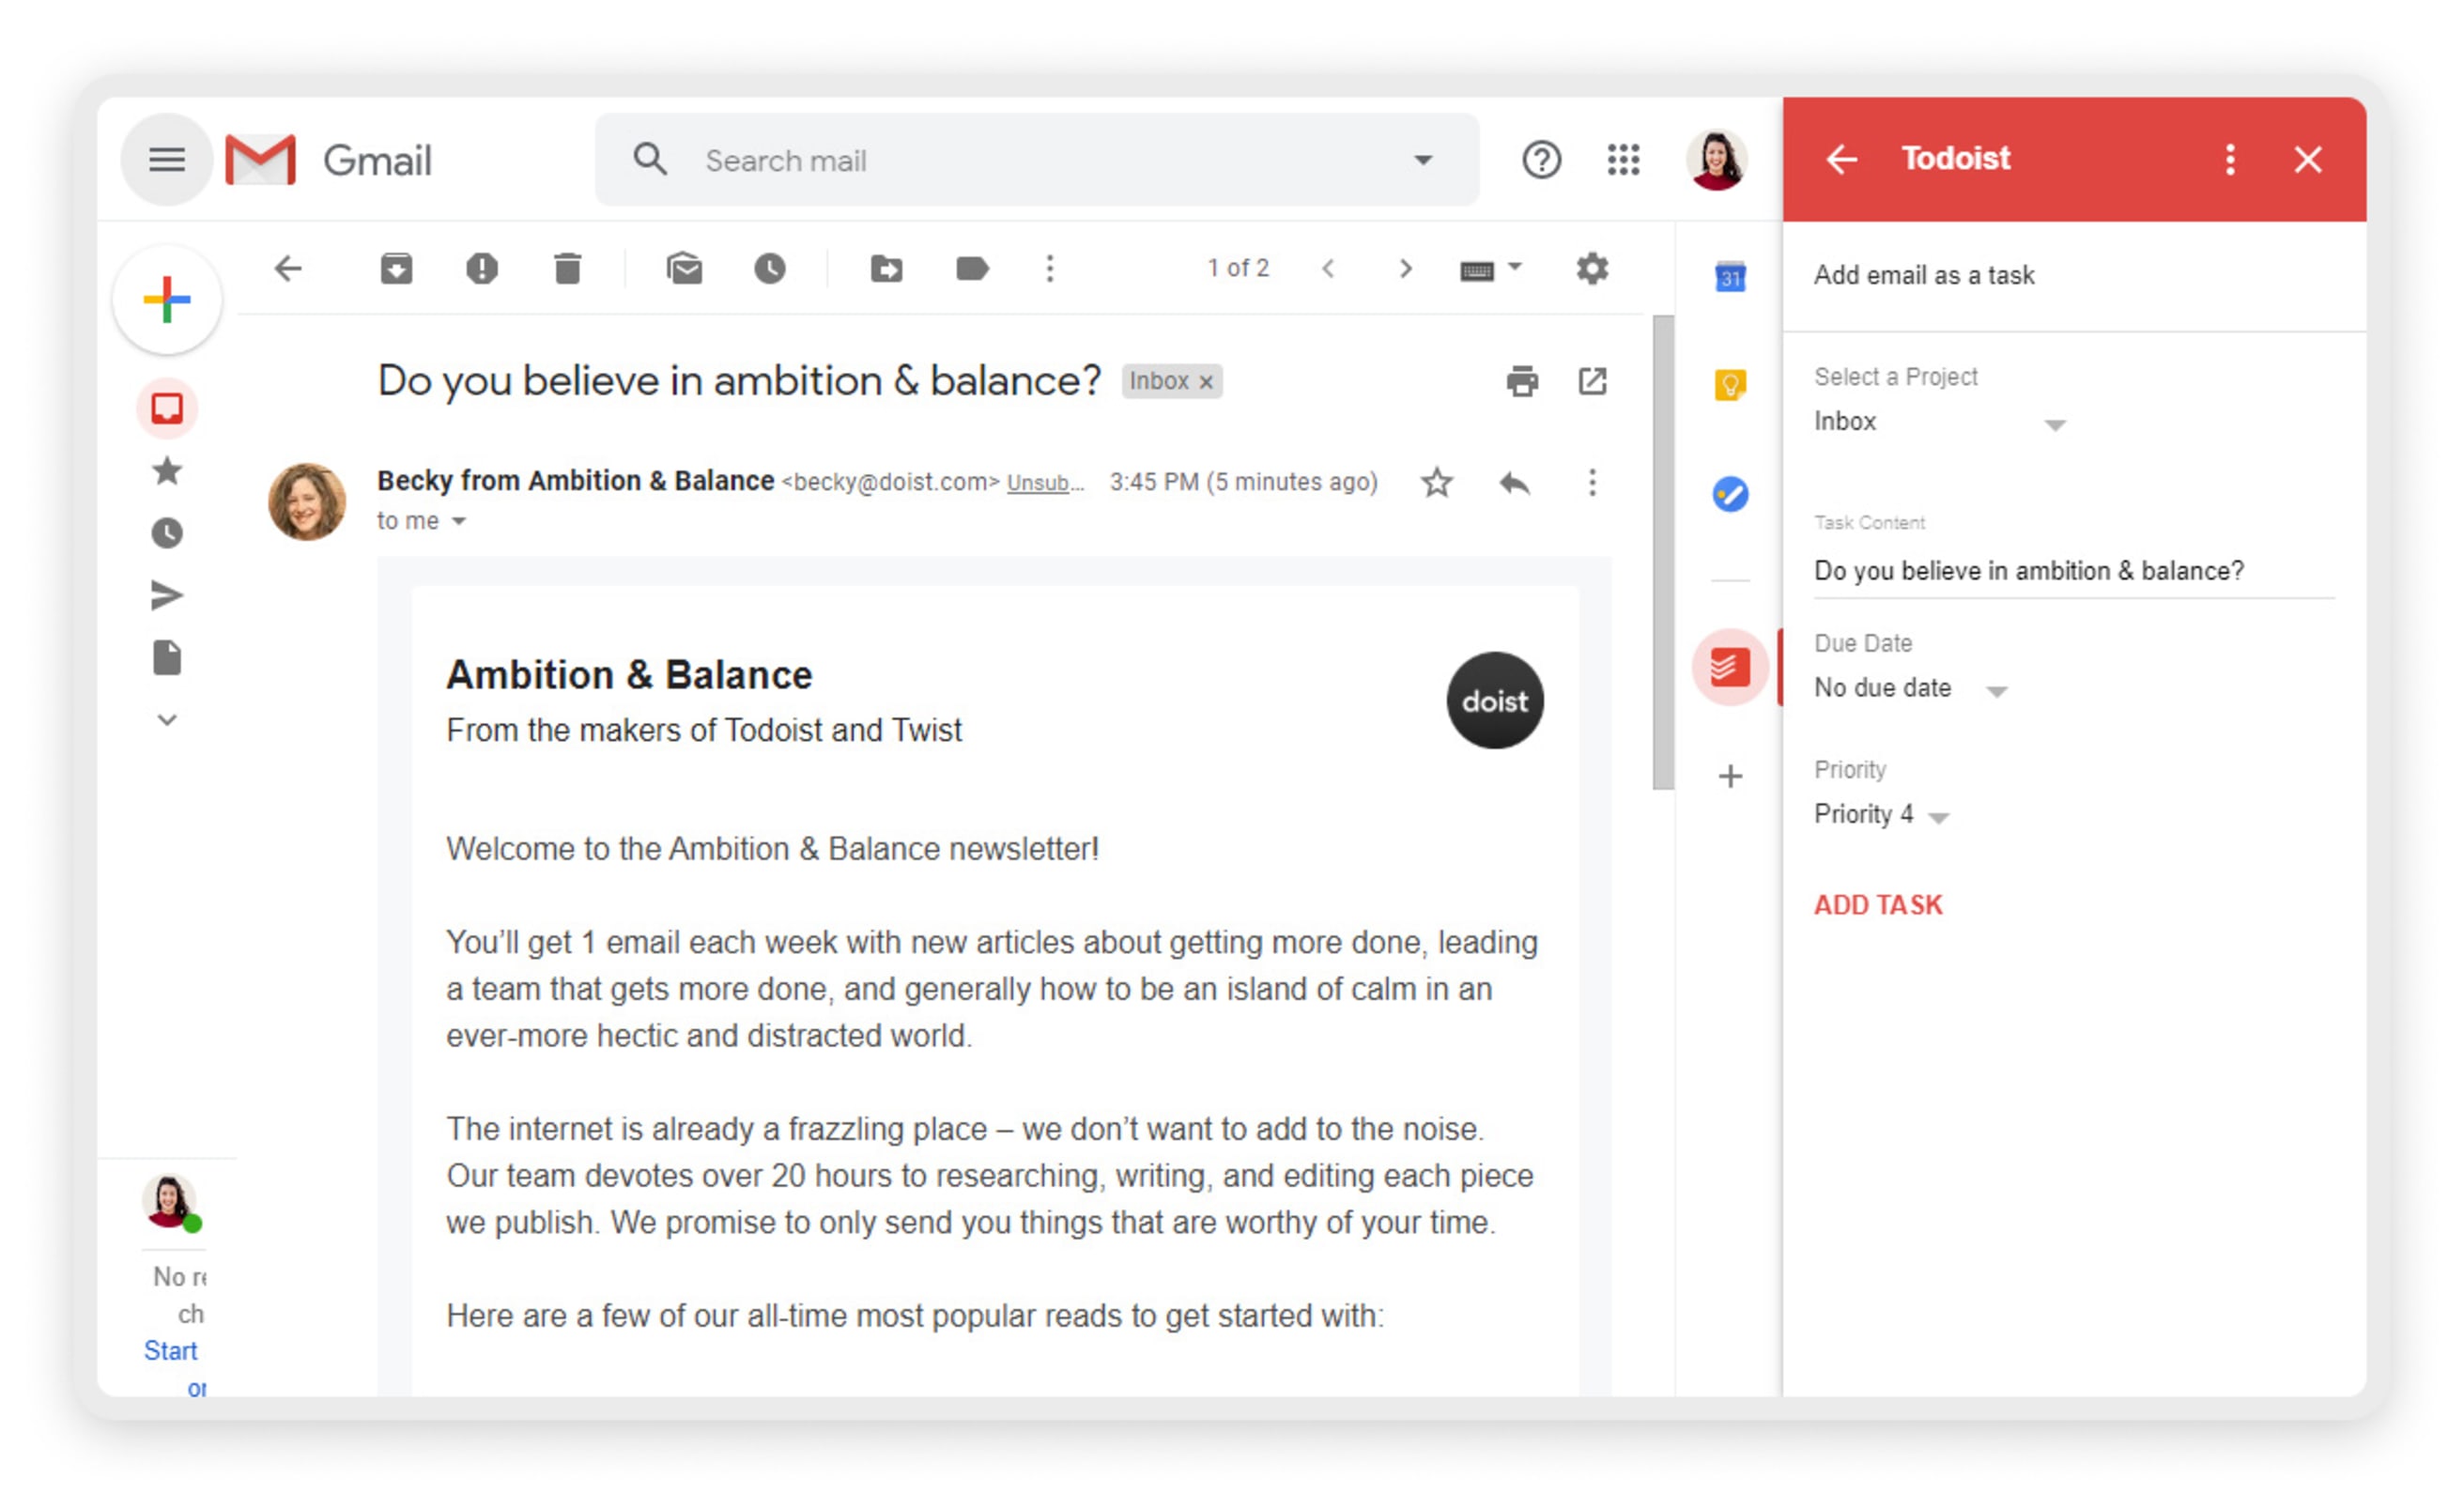
- Open the email you want to add as a task.
- To the right, click on the Todoist icon.
- (Optional) Select which project you'd like to add the task to, edit the task's name, set a due date, or add a priority.
- Click Add task.
Open emails through Todoist
Simply click on any task created via the add-on to open it in another window.
To use the “Todoist for Gmail” Google Workspace add-on, please use Gmail for web, iOS, or Android.
Remove the add-on
If you no longer want to use the Google Workspace add-on, follow these steps to remove it:
- Go to mail.google.com.
- In the panel to the right, click on the Todoist icon.
- At the top right, click on the three dots icon.
- Select Manage add-on.
- Click on Todoist for Gmail.
- Click Uninstall.
FAQ
Absolutely! Use whichever you prefer whenever you want.
Try allowing the pop-up windows in the browser, this will fix the issue. Here's how:
- Open Gmail in your browser.
- Click the lock icon in the address bar in the top left corner.
- Click Cookies.
- Open the Blocked tab.
- Select todoist.com.
- Click Allow.
- Select gmail.todoist.com.
- Click Allow.
- Click Done.
Try allowing the pop-up windows in the browser, this will fix the issue. Here's how:
- Open Todoist in Safari.
- Click Safari in the top-left (next to the Apple icon).
- Select Preferences...
- Open the Websites tab.
- In the left-hand side, scroll down and select Pop-up Windows.
- Open the menu to the right of todoist.com and select Allow.
This is a bug on Gmail's side, so our developers unfortunately won't be able to fix it. We instead recommend that you report this bug to the Google customer support team.